Myth 1 Fly Fishing Western Wyoming

Fluorocarbon vs. Mono

Fluorocarbon vs. Mono

THE FACTS :
a) Fluoro is not invisible. Just put a piece in a glass of water.
b) Mono makes stronger knots.
c) Fluoro does not sink significantly faster than mono, but it does sink enough that it should not be used when fishing dries..
d) Fluoro does not rebound after it is stretched, thus radically reducing
strength.
e) Fluoro is significantly more abrasion resistant than mono.
f) Fluoro does not lose its integrity over several years like mono. Fluoro can be used for 4 or 5 years at least. Mono – 2 years at most!
g) Fluoro is 3 – 4 times more expensive than mono.

CONCLUSION: Unless you are fishing along structure like rocks, pylons, etc., or you are fishing for toothy creatures like Spanish Mackerel or tough scales like Tarpon, there is no good reason to pay the price for fluoro. I no longer use fluoro for any of my freshwater fishing.

Fly Fishing Western Wyoming fly fishing guide outfitter drills casting

Drills Casting

Drills Casting

DRILL #1: PAINTBRUSH AND WATER DRILL AND ADD THE NOODLE

GOALS: Throw water off the brush so that it flies parallel to the ground for at least 6 to 8 feet.  No water should land on the forearm!

CASTING PRINCIPLES: Constant and smooth acceleration, to a sudden stop.

SET UP: 1 paint brush, 1 bowl with water, 1 – 2 1/2 foot noodle.

STEP 1: Find a grip you like. (Thumb pushing, forefinger pushing, the V between  forefinger and thumb pushing)

STEP 2: Dip the brush in the water bowl.

STEP 3: With a straight wrist, bring your hand up to about eye level and off to the side. (If a stick was sticking out of your ear, it should be pointing right at your hand.)

STEP 4: Check to see that the paintbrush is sticking almost straight up. (12:30 on a clock)

STEP 5: Now slightly cock your wrist back so the paint brush is pointing to 1 o’clock or a little more.

STEP 6: Without bending your wrist, bring your hand and forearm forward as you smoothly accelerate.

STEP 7: Just as you get to the end of your stroke, rotate your wrist sharply forward.

STEP 8: STOP – HARD, at about 10 o’clock.

TROUBLESHOOTING:

1) Water lands on your forearm behind your hand. You started to fast. Start more slowly.

2) Water goes off the brush parallel to the ground, but doesn’t go very far. Develop more speed and/or stop more sharply.

3) Water goes off the brush but at an angle towards the ground.  Stop at 10 o’clock!

BACKSTROKE: More unnatural, so really work at this one!

STEP 1: Put water on the brush.

STEP 2: Lift your hand to head high.

STEP 3: Cock your wrist forward just a bit.

STEP 4: Bring your hand and forearm forward into the same position where you stopped on the forward cast.

STEP 5: Smoothly accelerate backward without moving your wrist.

STEP 6: As your hand approaches your ear, sharply rotate your wrist.

STEP 7:  STOP -HARD at 1 o’clock!

NOODLE DRILL: Repeat above with a noodle!

DRILL #2: GRASS DRILL

GOALS: Narrow loops front and back, basis for double-haul drill and false casting

CASTING PRINCIPLES: Straight line rod tip path (appropriate arc for the amount of line), constant acceleration. A simple way to think of arc is to imagine your rod is the hour hand of a clock. Straight up is 12 o’clock, parallel to the ground and in front of you is 9 am, parallel to the ground and behind you is 3 pm. The amount of the clock face you use during a casting stroke is the “arc”.

SET UP: 70 ft. tape or rope on the ground with the wind at right angles to tape. Mark the middle with a cone. Place a cone at both ends. Stand in the middle of the tape with your back to the wind facing the tape.

STEP 1: Stand away from tape a little less than 1-rod length. Rod tip should be past rope 1 ft. or so. The line should be parallel to tape with yarn in front of you 35’.

STEP 2: Point the rod at 10:30 am and flex your wrist a little. Rod tip should now be on the tape.

STEP 3: With wrist only slightly cocked, start dragging line towards the backhand side with constant acceleration. Draaaag …

STEP 4: As rod approaches 1 pm, rotate wrist sharply (almost “pop” the wrist) and stop. The line should have created a narrow loop and line and leader should be parallel to tape. Try and hit the cone at the end of the rope with your yarn.

TROUBLESHOOTING

1) Open loop

a) Accelerated too fast to begin with.

b) Rod went too far before the stop or started too far back. (Remember to reduce your wrist flex and resulting arc!!)

c) Your stop was not abrupt enough.

2) The line did not fully extend.  Not enough power applied.

3) Created tailing loop.

a) Not constantly accelerating

b) Too short of an arc or stroke

STEP 5: Repeat one through 4, but as a forward cast.

Note: It is best to simply let the line sit still between the back and forward strokes, especially at first.  If the line doesn’t straighten, have your partner straighten it,, or you back away from it until it is straight. You need a straight line with no slack.

TROUBLESHOOTING:

STEP 5 – Same as in Step 4.

STEP 6 – Strip out 10 more feet of line and repeat. Walk towards line about 6” and repeat steps 1 – 5 above.  Rod tip should now be farther down the line. You have increased stroke length and arc as you increase line! Principle: Long line = longer stroke length and longer arc. Shorter line = shorter stroke length and a shorter arc.

Need a Challenge?

STEP 7: Increase line to 45ft. Increase arc and stroke. You will need to move a little closer to the tape.

STEP 8: Begin reducing the length of time the line sits on the ground between strokes until it is simply false casting.

STEP 9: Gradually move the cast to vertical. You will also need to gradually move your body from facing the tape to facing parallel to the tape. This is drill #3 in this clinic.

STEP 10: Repeat Steps 3 through 11 using line hand to control line

DRILL #3: PICK UP AND LAY DOWN DRILL

GOALS: a narrow loop front and back, line lands parallel to the rope.

CASTING PRINCIPLES:

1) Constant Acceleration to a sudden stop

2) No Slack

3) Pause

4) Straight line rod tip path

Step 1 – Rod tip down

Step 2 – Yarn at 35 feet

Step 3 – Line straight (no slack)

Step 4–  Lift while consistently accelerating (Line in rod hand)

At 9AM       10mph

At 10AM     20mph

At 11AM     40mph

At 12noon  80mph  STOP

NOTE: Most of the motion in this backcast should occur in the forearm movement. While doing this step, check the wrist. There should be minimal movement until just before the stop at which time it is best to rotate the wrist back a few degrees. Another important key to watch is the thumb. When the stop is made, the thumb should be pointing straight up.

Two ways to think of this step:

a)The rate of acceleration is a lot like flicking water off a paintbrush

b) Play like there is a big jolly giant looking over your shoulder and you are going to jab him in the eye with your thumb.

STEP 5 – After the stop, wait until the line is completely straight behind you.

STEP 6 – Start forward while consistently accelerating. Again, think of throwing water off a paintbrush – straight into the wall in front of you! Pound a nail!

STEP 7 – Towards the very end of your forward stroke, rotate your wrist and stop at 10 am. Your thumb and rod should now be aiming at 10 am.

STEP 8 – After the stop, lower your rod as the line falls. Ideally, your rod tip, line, and leader should all land on the grass at the same time.

Need a Challenge?

STEP 9 – Pick up more line!  Or, pick up the line off the other shoulder. Always make as small a loop as possible.

TROUBLESHOOTING:

1) Wide Back Loop – Began with too abrupt acceleration and/or dropped rod too far back. Check your wrist and thumb positions. Watch your backcast!

2) Wide Front Loop – Top Leg Parallel to the Ground, Bottom Leg Dipped. Dropped your rod too much before the stop.

3) Wide Front Loop – Bottom Leg Parallel to the Ground, Top Leg Open Started forward cast too far down and/or started too fast.

4)Wide Front Loop – Bottom Leg Wide, Top Leg Wide Also Problem is a combination of both Started forward cast too far down and/or started too fast of the above faults.

NOTE: Most wide loops are caused by too much wrist action causing a rainbow-shaped rod tip path. Keep that thumb scraping the ceiling, or use the forefinger on the top of the rod butt.

5) Rod Doesn’t Bend Enough on forwarding Cast –  (Line doesn’t shoot all the way out.)

a) The line did not straighten out behind – remember that in order to bend the rod, there cannot be slack in the line or,

b) Not enough power on the forward cast.

6) The line appears to have enough speed on the forward cast, but line dumps before it straightens.

a) Too much power causes the line to “rebound”.

b) Rod tip stayed high as line dropped.

7) Tailing Loop –  Spike in power – smooth it out!

DRILL #4: FALSE CAST DRILL

GOALS: Narrow loops kept in the air without touching the ground.

PRINCIPLES: No slack, good timing. proper acceleration, straight line rod tip path.

USES IN FISHING: Feeding line, drying a fly, changing directions, measuring the distance

STEP 1 –  Start with Grass Drill.  Start with 35’ of line. Stop and wait! Wait until line straightens.

STEP 2 –  Come forward with the water-on-a-paint-brush acceleration. Stop at about 10 am. Wait until line straightens.

STEP 3 –  Now backcast as in Step 1.

STEP 4 –  Repeat back and forth and gradually reduce the amount of rest you allow.  Then gradually bring the rod up to vertical. If you have problems, start over with the line on the grass.

Need a Challenge?

STEP 5 – See how many lines you can hold in the air with tight loops!

TROUBLESHOOTING :  [Once up in the air.]

The line doesn’t straighten:

a) you didn’t wait for it to straighten on the previous stroke forward or backward.

b) You didn’t accelerate to a stop.

c) Your rod path looks like a windshield wiper (too much arc)

d) You didn’t apply enough force.

The line hits the ground: 

a) you haven’t accelerated with enough power.

b) Your rod tip is dipping below 1 pm in the back or below 10 am in the front.  (too much arc)

c) You waited too long to begin the next stroke.

The line hits itself (tailing loop):

a) You had a spike in acceleration somewhere in your stroke – smooth it out!

b) You stopped the rod too soon. (not enough arc)

c) You stopped the rod okay, but you ‘crept’ forward before beginning the next stroke.

d) You didn’t wait to start the next stroke. (You started before the line straightened out.)

DRILL #5: FEEDING LINE DRILL

GOALS: Pick up 25ft of line and feed to 45ft. of line. (Use Pick Up and Lay Down Drill to start.)

Principles: No slack, straight line rod tip path, constant acceleration, pause or timing, arc, and stroke match line length.

STEP 1: Place yarn at 25ft. Rod tip down. Line straight. 20 ft. of line stripped off the reel and coiled on the ground.

STEP 2: Execute pick up and false cast a few times, keeping your line hand on the line.

STEP 3: After a forward cast and stop, let the line go with your line hand.

STEP 4: After a few feet of the line has moved through your guides, clamp down on the line again. By now the line should be straight in front.

STEP 5: Now it’s time to start your back cast. When first learning, you can take a few more casts before again feeding line on the forward stroke. Continue until all line is off the ground.

TROUBLESHOOTING:

1. The line does not shoot or dies in a pile on the forward cast.

a) the line was released too early

b) not enough power on the forward cast.

c) back cast did not straighten before the forward cast was initiated (to slack)

d) line was released too late.

STEP 6: Work at feeding more line with fewer false casts.

STEP 7: Work at feeding line on forwarding and back casts.

Need a Challenge?

Step 8:  Starting with your fly at 25’, see how many lines you can shoot in 3 false casts.

NOTE: Feeding and shooting line efficiently is a prerequisite to “Quick Casting” to moving fish. It also allows the angler to spend more time with the fly in the water. (Not a whole lot of fish in the air!)  It also prevents fatigue and helps to reduce spooking fish.

DRILL #6: ROLL CAST DRILL

GOALS: Cast 35ft. off either shoulder.

PRINCIPLESNo slack, straight rod tip path, constant acceleration, arc, and stroke match line length.

STEP 1Strip 35ft. of line off the rod.

STEP 2: Place an anchor at 18ft.

STEP 3: Place your yarn in or under the anchor.

STEP 4: Point your rod tip at the anchor and move it to 20 degrees or so to the outside. (Tip-down)

STEP 5With a straight wrist, slowly lift yours to 12:00. At this point, you should have your line coming off the ground about even with your feet or a little behind you. If it is coming off the ground in front of you, move forward. If you still have lots of slack, move back. This is now your starting point. You have created a “D” Loop.

STEP 6: Check your hand and wrist. The hand should be about even with your eyes. Now cock your wrist back a few degrees so your rod is at about 1:30.

STEP 7Check your alignment with the target. The most efficient cast will be aimed in a straight line slightly to the side of your fly line.

STEP 8: Execute a forward cast.

1) Constantly apply acceleration. (paintbrush analogy!)

2) Keep your thumb scraping the ceiling. (Straight line rod tip path)

3) Wait to rotate your wrist until the very end of your stroke.

4) STOP at about 10:30 o’clock.

STEP 9: Lower your rod and follow the line down.

TROUBLESHOOTING:

1) Big Open Loop

a) Caused by too much arc (usually too much wrist)

b) too much power too early in the cast.

SOLUTION: Reduce the arc and concentrate on the paintbrush!

2) Line Dumps in a Pile :

a) Caused by driving your rod tip too far down before the stop.

SOLUTION: Stop your rod tip higher!

b) Not enough force applied.

SOLUTION: Apply more force, but make sure to apply the acceleration constantly over the length of your cast.

3) The line hits itself :

a) Make sure to drive your rod to the side of your line – never over or across your line. If the wind is from the side, you need to drive your rod to the downwind side of the line.

STEP 10Repeat from opposite shoulder.

Need a Challenge?

STEP 11Cast into the wind, longer casts, crosswind casts, headwind casts, etc.

FISHING APPLICATION: Take up the unwanted slack, cast with obstructions behind you, pick up a big fly or sink tip line, quickly aerialize the line, get a hook off a rock.

DRILL #7: ROLL CAST TO PICK-UP-AND-SHOOT DRILL

GOAL:  Roll Cast Pick-up 25ft. of line and feed or shoot to 50ft.

PRINCIPLES: No slack, timing matches line length, straight line rod tip path, arc, and stroke match line length, constantly accelerating.

STEP 1: Strip off 50 ft. of line

STEP 2:  Pull your yarn back to 25ft.

STEP 3: Now execute a roll cast, but keep the forward cast OFF the grass and in the air. When the forward cast straightens, begin your back cast. (You may need to aim your roll cast at an upward angle.)

STEP 4: When your back cast has straightened, begin a forward cast and, in the end,  stop … release the line.

STEP 5: Continue False Casting and feeding line until you can reach 50ft.

PROBLEM-SOLVING: All problems should be resolved by referring to the previous drills and their problem solutions.

Need a Challenge?

STEP 6: Shoot as much and as quickly as possible. Start with more line.

STEP 7:  Do the same drill, but over the opposite shoulder.

FISHING APPLICATIONS:  This series of skills are used on a regular basis especially when fishing moving water. It saves lots of time as the amount of time stripping line back to start a new cast is drastically reduced This cast is especially useful when fishing from a drift boat as there are many times you want to get slack out in a hurry, and then make a cast.

Fly Fishing Western Wyoming fly fishing guide outfitter catching blog

Five Essentials of Catching

Five Essentials of Catching

I’m stealing part of the title of this article from Bill and Jay Gammel’s “Five Essentials of Fly Casting”. If you haven’t read it, you should. It is a good way to begin understanding the principles behind casting a fly rod and line. This article will be a bit broader in scope. In my view, there are five main components of catching fish with a fly rod. Anywhere, any place, any type of fish, if you want to be optimally successful, all five are essential.

Where are the fish?

In many environments 90% of the fish hold in less than 10% of the water.  For example, in large lakes, oceans, and other large still waters, fish will hold at certain depths during different times of the year. If we are 10 feet off, too low or too high, we’ll catch no fish. Depending on species, time of year, insect hatches, water flow and temperatures, we will find lots of trout in riffles and sometimes absolutely no trout will be in the riffles. Obviously, if we are fishing where there are no fish it’s a little tough to catch fish!  If we want to catch fish, we need to learn where they are!

What are the fish eating?

If we are casting flies we’d better know what to put on the end of the leader! A good knowledge of entomology is important in trout fishing, plus we’d better know how to identify and match other food forms like leaches, baitfish, crawfish, and even mice and newts. Other environments require knowledge of the local baitfish, eels, crabs, shrimp, worms, and snails. I’ve caught large-mouth bass on birds, snakes, and frogs. Even if we find the fish, if they are eating hamburgers and we are tossing hot dogs, we will catch only the occasional outlier. If we want to catch fish, we need to learn what the fish are eating!

How to present the fly? 

This is mostly about casting, equipment and positioning. How do we get the fly to where the fish is, and in a way that imitates the life form we have chosen? Is a sink tip line better than a floating line? Is a long head better than a short head? Is a curve cast better than a dump cast? Local guides can help us with finding fish and knowing what to put on the leader. They can even help with where to stand or anchor and what type of equipment to use, but they can’t teach us a complicated cast in 5 minutes, on the water, with fish boiling in front of us. It simply isn’t going to happen. Without knowing how to make a number of different types of casts we will catch a lot fewer fish, at least on most days. By way of illustration, I was recently guiding two anglers on a local river. The fishing was tough and very precise presentations and accurate drifts were required. A friend of mine who is a casting instructor was fishing the river at the same time.   We happened to meet in the parking lot before my clients arrived. He asked me what was going on and I told him the type of flies that were working and the presentations needed. (He had never fished the water before.)

My two clients arrived and we happily trotted down to the river. At lunch, I saw my friend again. I asked him how he had done (out of the earshot of my frustrated clients). He told me he had hooked eleven fish (a good number for even an old hand at that river). One client was an okay caster, but lacked accuracy and mending skills;  he hooked four fish. The other client was a poor caster with very limited skills;  he hooked one fish. When we arrived at 8 am there were seven cars in the lot. When we ate lunch every car but ours departed with the occupants making comments like, “Boy, they aren’t biting today!” and “I don’t think there are any fish in here!”.

The difference was knowing where the fish were, what they were eating, and most importantly, how to cast to them. My clients were told where the fish were, and exactly what to fish with. They couldn’t cast very well.  My friend knew what to fish with, but had limited specific knowledge of the fish’s locations, but despite this handicap, he hooked 11 total fish to their five total.

What casts should we know? Other than being able to dictate accuracy, I believe the makeup of the following cast 90% of what we need to get to most fish:  roll cast and roll cast to a pickup and shoot, double haul, some form of dump or slack line cast, and aerial mends to the left and the right. In addition, we must be able to cast reasonably well to all positions in a wind! I can’t count the number of times a client is forced to cast into a headwind and is unable to do so. $450.00 to keep picking flies out of one’s shirt seems a little stiff to me! Get some casting lessons and practice! We’ll hook three times as many fish in many circumstances. If we want to catch more fish, we need to learn to cast and present the fly better!

How to set the hook

Let’s go back to the previous story involving my friend and my two clients. It should be noted that I used the word ‘hooked’ and not ‘landed’.  My friend landed nine of his eleven fish. My clients landed one of their five fish. We were using 5x tippets with size 18 nymphs and the fish are big, burly, explosive 18” – 21” rainbows that simply explode on being hooked. How do we protect weaker tippets? How do we set the hook? Another example is tarpon fishing. A straight, very violent strip set is essential. Even then the hook might not penetrate. Without it we have no chance! My guiding record on the river mentioned above is 18 straight break-offs! (The incorrect equipment, too stiff a rod tip had something to do with it, but the two clients wanted to use their rods. Lesson learned – take the guide’s advice!) Learning to make the correct set is a big part of success in many fishing situations. If we set too soon, too late, or too hard or too soft, we may not hook the fish or we will break the fish off on the hook set. If we want to catch more fish, we need to learn to set the hook properly!

How do we fight and land a fish?

I’ve seen lots of fish lost after everything else was done correctly! Let’s discuss the river mentioned previously. In that environment, we need to get out of the water ASAP and we need to move!  Sometimes we need to cross the river to keep the fish away from willow roots. If the fish goes that way,  we need to really move downstream. We need to put the line at right angles to the fish, which involves knowing where our rod belongs. Another example, when dock fishing for snook in Florida, we always have someone on the trolling motor to spin the boat. Any help we can get to keep that fish from the pylons is appreciated! At what angle and direction should the rod be pointed? How much pressure can we apply? A lot of this is experience and actual fishing practice. If we want to land more fish, we need to learn how to fight them!

Conclusion

Too often we blame other factors when we fail to catch fish, when in fact the fault is ours. As someone once said, “When we miss the bullseye, the fault doesn’t lie with the target”.


Fly Fishing Western Wyoming fly fishing guide outfitter fishing practice tips

Fly Fishing Practice Tips

Fly Fishing Practice Tips

Nearly everyone is busy and finds it hard to make time to practice. Here are a few tips that might help you get over the hump.

Find a partner – If we make a commitment to another person, we are less likely to let distractions get in the way of a practice session. Besides, the partner can help us by seeing the cast in a way we are not able.

  • Have a regular schedule – For example, every Wednesday after work, every Sunday morning for an hour before the family day begins.
  • Frequent small chunks are better than infrequent, long chunks. Keep a rod in your car. If you have 15 minutes and you are driving by a park, stop and cast for 10 minutes.
  • Have a specific goal and keep records. Pick a task like distance, or accuracy, or quick-casting. Stick to one thing until you improve. Measure and mark your progress.
  • Get a practice rod. Several manufacturers sell small rods that can be used in any yard. I like the Form, made by Redington. It sells for $39.00 and can be found under accessories at Redington.com

Practice without a rod! I’ve learned my most complicated casts by pantomiming the motions while I watch TV. You will train your nervous system quickly and efficiently!

Fly Fishing Western Wyoming fly fishing guide outfitter money charge blog

How Do Guides Charge?

Why Do Guides Charge so Much?

I will often hire a guide when fishing a new river because it cuts my learning curve dramatically. A good guide may not know as much as me about entomology, casting, and various nymphing and streamer techniques, but what he does know is where the fish are and what they are eating. So, for me, a good guide saves me lots of time when fishing a new river. On a 3-day trip to a new river, I hire a guide the first day so the next two days I can catch fish. Time is money and if my main goal is to catch fish, as opposed to say sightseeing or practicing my casting, I will usually hire a guide. I’m paying for his or her knowledge, gained through sometimes decades of experience. All of those years cost them money and countless hours and so they are charging me for that expenditure and experience.

There are other reasons for high rates, that escape the notice of the casual angler. I can’t tell you how many times I’ve heard someone say, “Wow, $525 for a day; that guy is making $500 in profit.” Let’s just look at the fixed costs of running a guide service. A typical drift boat runs around $10,000 if one includes “extras” like a good anchor system, nice seats, a first-rate trailer, ice chests, floor mats, first-class oars, etc. That can be amortized over about five to ten years, depending on where and how it is used. Every guide has extra rods, reels, lines, etc., that amount to $1,000 to $5,000, depending on the quality and type of equipment. These are usually amortized over one to five years. Lines and leaders, for instance, need to be replaced every year. Liability insurance runs about $1,000 a season, auto and boat insurance another $1,000 a season. Lunches for clients run $7 – $10 per day per person. Trespassing fees run anywhere from $10 per person to $25 per person; shuttle fees are $25 to $50 per trip.

In Wyoming, many guides average 100 miles per day at 15mpg average, (with boat and truck) that comes to almost 7 gallons of gas at $4/gallon, or $28 per day. Depreciation and maintenance is another $.30 to $.50 per mile or $30 to $50 dollars a day. Depending on the trip and the clients, the typical guide loses or ruins 5 to 15 flies per person per day at about $1.50 to $2.50, wholesale, per fly.  Let’s say $15 per day. I haven’t included clothing, tools, waders or boots – let’s say an average of $500 per year. (I know guides who wear out two pairs of waders and/or boots a season!)

The guide gets up at 6:30 am, makes or buys food, ice, drinks, organizes flies, equipment, and drives to the client meeting place. The trip itself runs from 8 am to 5 pm (sometimes longer). The guide drops the client off and then goes home to clean the boat, tie flies, organize equipment, answer phone calls and emails, etc. and is done by 7 pm. Easily a 12 hour day. Guides who work for an outfitter typically give the outfitter $200 – $250 per trip and, as a result, insurance costs are covered but most other costs listed here are not. That’s why many outfitters are charging $525 – $550 per day. The guide gets $275 to $325 per day and retains many of the costs listed above.

Let’s add it up!

Fee for 2 people   $550

Less outfitter fee   – $200

Less fixed costs    – $125 (minimum)

$225  divided by 12 hours = $20/hour

By the way, outfitters permits are very expensive so the outfitter is also justified in asking for his/her cut! So, what is the good guide getting for the equivalent of a college education in experience and knowledge? $20.00 an hour. Not too many of their clients will work for $20 an hour!! So, the next time we hire a guide, if he or she is good, we need to appreciate the guide’s value.

Fly Fishing Western Wyoming fly fishing guide outfitter release fishing blog

Releasing Fish

Guided Catch and Release

While everyone we guide practices catch and release, lots of new and old research tells us that regardless of the care taken, there is an 8% mortality rate. What we’d like to do is keep the damage done to a minimum.

Here are some basic rules we follow:

1. We don’t take pictures of every fish you catch. In all probability, you will catch one of the biggest trout of your life. We will take a picture of your first fish if it is important to you. After the first fish, our policy is generally to take a picture of only very special fish – extremely colored or extremely big.

2. How we take pictures

  • The client holds the net while the guide removes the fly while the fish is in the water and in the net. (Barbless hooks only.) If the fish requires some reviving, it is done at this time. If the fish doesn’t act normal almost immediately, the pictures are off the table and the only priority is reviving it and returning it to the water. Play your fish as fast as possible!)
  • The camera is readied while the client puts the rod on the bank.
  • The client kneels in the water while wetting his/her hands.
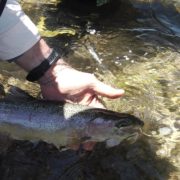
  • The client reaches into the net and gently cradles the fish. One hand under the shoulders with no fingers or thumbs around the fish. The other hand holds the fish in the same way under the rear of the fish.
  • The fish is gently lifted while the net is kept under it.
  • The picture is snapped within a few seconds and the fish is returned to the water. If the fish is a flopper and/or the client is unable to hold it properly, there will be no pictures. We hope our clients understand our catch and release protocols. We want to catch the same fish next year – or next week! And that might be you! Pictures of the fish can be taken in the net and even underwater so that it really isn’t encouraged that fish even be removed from the water.